Why Isn’t Snapchat Web Working?
1. Snapchat Is Down
An issue with many apps is that the social media app itself can be down and unavailable, making many of the features unavailable to the app users.
When an app is down, the app and its features cannot be used to their full extent, and this is something that can happen for many reasons, such as software updates or internet problems with the servers that the social media app uses.
Fix – Wait For Snapchat To Go Back Up
When an app is down, the only thing that can be done is essentially wait for the app to come back up and be accessible again.
First of all, if you suspect that Snapchat might be down, you will need to verify that it is indeed down in the first place. This is something that isn’t so hard to do as this information can be accessed by everyone looking for it.
You will want to go ahead and find access to the official Snapchat website or social media accounts in order to see if they have posted any information that tells you that the app is down.
If you do not have access to the website, you can ask a friend you know has the app and see if the app is down for them. All of these are ways to verify if the app is down or if the issue is deeper than it seems.
Once you have verified that the app really is down, then all you will need to do now is simply wait and see until it comes back up.
Waiting might not be the easiest thing to do when it comes to an addicting app such as Snapchat, but most apps are not down for a long time, so don’t worry too much.
In order to see when the app is up and running again, use the previous methods you used to verify the status of the app and see if it is back up.
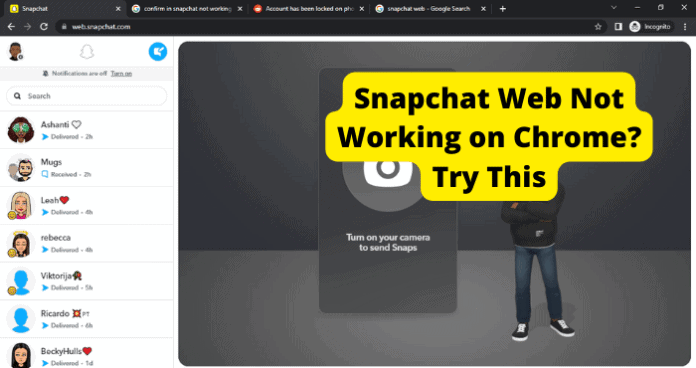
2. Issue With Chrome
If you are using a browser, specifically Google Chrome, in this case, you might want to consider having issues with the browser you are using to access the Snapchat webpage.
There are some troubleshooting methods that you can follow in order to get this issue resolved and gain access to the Snapchat webpage again.
Fix – Clear Cache in Settings
In order to start with getting rid of any issues that Snapchat on the web might potentially have, you will want to start off and try to clear the webpages or the browser cache.
Clearing a browser’s cache essentially removes the short-term memory that the app has. In order to clear the browser’s cache, you will need to be able to follow the next steps in order to perform this process successfully.
1. Head over to your phone’s Settings app.
2. Once you are on your phone’s settings menu, scroll down the menu and look for the option that says Apps.
3. After you have found the apps option on your settings menu, find the option of whatever browser you are using in the menu. This could be Google Chrome or Safari, depending on what kind of device you are using.
4. Under the browser’s page, you will see an option to clear the browser’s cache.
5. Go ahead and clear the cache for the browser.
6. After you have cleared the cache for the browser, try opening the browser again.
7. Open up the browser and see if you can access the Snapchat webpage.
Fix 2 – Update Chrome to Get Rid Of Bugs
It might be time to go ahead and update the browser that you are using. Many times, updating the browser that you are using helps with getting rid of any potential bugs or software glitches that the browser might be experiencing.
In this section, we will focus on how to update the Google Chrome browser. Updating the browser is easy, so go ahead and follow the next steps to get the process accomplished successfully.
If you are using a computer
1. Open up the Google Chrome browser on your computer.
2. Go ahead and click the three dots that can be found in the upper right-hand corner of the page.
3. After this, click on the Help option and then select the About Google Chrome option.
4. An update will automatically launch if there is an update available.
5. Once the update has finished, click on relaunch in order to restart the browser and install the updates.
If you are using your Android phone
1. Open the Play Store on your device.
2. Tap the profile icon in the store.
3. Select Manage apps and devices.
4. After this, select See Details.
5. After this, select the Update next to Google Chrome.
If you are using your iPhone
1. Open the App store on your devices.
2. Tap your Profile icon.
3. After this, scroll down and tap Update next to the Google Chrome option.
Fix 3 – Use Another Browser
If you are using a browser that you use frequently, you might want to try and use another browser to see if perhaps the real issue behind you not being able to access the Snapchat webpage.
Go ahead and use a different browser or if you do not have another browser on your phone, you can go ahead and download a new one such as Google Chrome that is available on all devices.
Fix 4 – Clear Cache
You should try to clear the cache directly from the browser as well if the previous troubleshooting method did not help with your Snapchat issues.
Clearing a browser’s cache helps get rid of bugs since it essentially clears an app’s memory and clears any potential glitches and bugs. Try the following steps to clear your browser’s cache.
1. To start off, you will want to open up your computer or phone you will want to delete the cache from the browser.
2. Once this is open, go to the top right-hand corner of the page and click on More.
3. After this, go ahead and click more tools. Once this is clicked, find the option to Clear browsing data.
4. An option to choose a time frame will pop up. Here you will want to choose a time frame for how far back you want to clear the browsing data and cache. If you want to delete all the cache, then go ahead and choose the option “All Time”.
5. You will want to check off the boxes next to “Cookies and other site data” and “Cached images and files”.
6. After checking off these boxes, go ahead and clear the data.
3. Poor Internet Connection
A common issue that causes lots of problems when it comes to using any sort of social media app is making sure that the internet connection you are using actually works and allows you to stay connected to the internet and therefore use the features that the social media app provides.
Think about it this way: if you do not have a good internet connection, then chances are that you won’t be able to connect to the internet, and services that would usually be available for you to use in whatever app you are using, will no longer be available to you.
There is no exception in this case with using the Snapchat webpage. You will get the best service when using the Snapchat webpage by ensuring that your internet connection is up to the best standards.
Follow the next troubleshooting steps to find the solution to the issue of being unable to access the Snapchat webpage in your browser.
Fix – Turn Your WI-FI Off Then On
Most users will ensure that instead of being connected to their mobile data, they are connected to their home Wi-Fi or a public connection to limit how much mobile data they use.
When using wifi, you often need to make sure that the connection you are using is connected and has access to the internet, besides making sure that the connection is also safe for them to use.
However, if you are connected to a Wifi network that does not have any access to the internet, but you are still connected, then this will most likely limit what kind of access you have to certain features on some of the apps that you use the most, and this includes the feature on Instagram stories that allows you to like someone else’s story.
You will want to try and turn off your wifi in order to see if this is the issue that you are having. Follow the next steps to ensure you can successfully turn off your wifi network.
1. Close the browser that you were using on your phone.
2. Go ahead and head over to your main menu on your phone and locate the settings app on your phone.
3. Once you find yourself on your Settings main menu, find the option that allows you to edit your phone’s Wifi settings.
4. Click on this option in order to go ahead and start fixing the issues with your wifi.
5. Once here, click on the disable button to turn off the Wifi connection to your phone.
6. Once the wifi is turned off, go ahead and try to open up the Instagram app again to check if turning off your Wi-Fi network helped with being able to access the Snapchat webpage in your preferred browser.
Fix 2 – If You’re Using Data, Get Into an Area With Better Signal
Sometimes when Wifi networks are unavailable, and all you have to connect to the internet is the data that your mobile carrier provides, you might notice that your signal might not be as strong as it used to be.
In order to try and get the best signal possible, you should try moving into an area that you know has a better signal. This might mean moving into an area that is free from any obstructions and is open in order to receive the best signal you can.
Fix 3 – Switch from WI-FI to Data Vice Versa
You will also want to try playing around with whether the internet signal you are receiving is stronger when you are connected to Wi-Fi than when you are connected to your mobile data.
Play around with disabling both sources of internet connections to verify which one can provide a more stable and stronger connection depending on where you find yourself at the moment.
There are a few steps you can take in order to switch between connections to find the best one for you.
1. Head over to the Settings menu on your device.
2. Once you are at your phone’s Settings menu, head over to the option to see the Wi-Fi connections available for your device.
3. If your Wifi is enabled, click to disable it and go ahead and confirm your action.
4. Once you have disabled the wifi connection, wait a few seconds before enabling the connection to turn the wifi back on your phone.
5. Once the Wi-Fi is back on your phone, head over to the browser you were using to verify if you can access the Snapchat webpage.
6. If the signal is still not stable and you wish to verify if your mobile data is stronger than the Wifi connection, then you will need to follow the previous steps again.
7. Once you have disabled the Wifi connection, head out of your Settings and open up the Hinge app.
8. Verify if switching over to your data connection has allowed you to gain access to the Snapchat webpage.
Fix 4 – Turn Off VPN
Something that has become pretty common in the tech world is for everyone to be using a VPN or a Virtual Private Network to keep their browsing history and traffic as safe as possible.
However, when you end up using a VPN, this can limit the kinds of features available to you when you have the VPN enabled. This might be one of the reasons you cannot access the Snapchat webpage.
This is something that is as simple as it was to disable your Wifi connection. Follow the next steps in order to turn off your VPN and verify if this can fix your issues with the Snapchat webpage.
1. Start by closing any apps you are on, including the browser that you were previously using, to ensure that when you open up those apps and the browsers again, you can use your mobile data instead of the previous Wifi connection.
2. Once all of your previous apps have been closed, go ahead and head over to the main menu on your device.
3. Find the Settings app on your main menu and open this up.
4. Scroll down the Settings menu until you are able to locate the option for the VPN menu.
5. Click on the VPN option. Click on the disable or turn off the option that is found within the VPN menu.
6. Once the Wi-Fi is disabled, you will notice that the VPN icon has disappeared.
7. Once your VPN has been turned off, go ahead and open the Hinge app and verify if this has fixed the issue you were having with not being able to access the webpage for Snapchat.
Fix 5 – Restart Router
Perhaps the issue with your bad connection is coming directly from your router, and restarting the router can fix this issue.
Modems and routers nowadays will come with a power button and a reset button already installed on the device in order to make these processes much simpler. Let’s start off with the process of restarting your router.
1. The reset button is located at the back of the device. In order to be able to reach the inside of the hole and actually reset the device, you will need a small sharp object such as a paperclip or an earring.
2. The power button will allow a user to restart the networking device without even needing to unplug the router in the first place. If your device has no power switch, you can also turn off the device by pulling the plug out of the power outlet.
3. After this, you will want to wait for 15 seconds. Follow this by then plugging the device back in. Performing this power cycle will help ensure that everything restarts correctly.
4. Go ahead and continue by unplugging the modem and router from the power outlet. Wait at least 15 seconds.
5. Follow this by plugging the modem back into the power outlet first. After this, you will want to wait about 2 minutes.
6. Now it is time for the user to go ahead and power on the router.
7. After doing this, you will want to wait for all panel lights on your cable modem to become green. Make sure you do this before testing your internet connection.
8. After this is done, you will need to connect to the network using your computer and once this is done, make sure to test the internet connection. It’s always better to test this by connecting with an ethernet cable. This can be done by directly plugging the ethernet cable into the router.
Fix 6 – Reset Router
Take your issue with your router one step further, and try resetting your router completely in order to see if this fixes the issue. Follow the next steps in order to try resetting your router as well.
1. First, start the reset process by unplugging your router and modem from the power outlet in the wall.
2. After this, you will want to unplug any connections between your modem and wireless router. Wait a few seconds to allow the router to refresh and remove any stored data and allow the equipment’s memory to have time to refresh as well.
This process should only take about a minute or two at most, and this does not cause any harm or damage to your device.
3. After you’ve let your modem and router refresh completely, you’ll want to plug your modem into the wall first. It is very important that you plug in your modem’s power cord before your modem.
Don’t plug your router in yet, and ensure you don’t hook up any other connections. Allow for about a minute for your modem to power up. During this power-up process, you will see the lights on the front of it blink or turn on and off.
4. After this is done, you will want to wait until most or all of your modem’s lights are glowing green. After this, you are ready for the next step.
5. After this, it is time for your router to start broadcasting that Wi-Fi signal. Start this by going ahead and plugging it back into the wall and reconnecting it to your modem.
6. Once you’ve plugged your router back in, the user should give the modem a few minutes to allow it to turn back on properly.
7. After both your modem and router are powered back up, it’s time to update your firmware and any apps your equipment uses.
Updating your firmware is an important process because firmware contains updates for your router and modem that keep them running smoothly.
Performing these firmware updates will make sure to remove any performance problems and may even help make your internet speed a lot faster, making your overall internet experience a much better one.
4. There’s An Issue With Your Device
Fix – Force Restart Phone or Restart PC
1. Close the browser or the last app that you were on.
2. Once you find yourself on the menu, tap and hold on both the power button and any of the volume buttons on the side of your device.
3. Make sure to press and hold both of the buttons at the same time for a few seconds.
4. After pressing down for a few seconds, you will notice that your device’s screen will turn black.
5. Once the screen turns black, let go of the buttons. The restart process will begin.
6. After your device has restarted, you should have your device turn back on as it normally would.
7. Open up the browser you previously used and try to access the Snapchat webpage.
8. Check if you now have access to the Snapchat webpage.