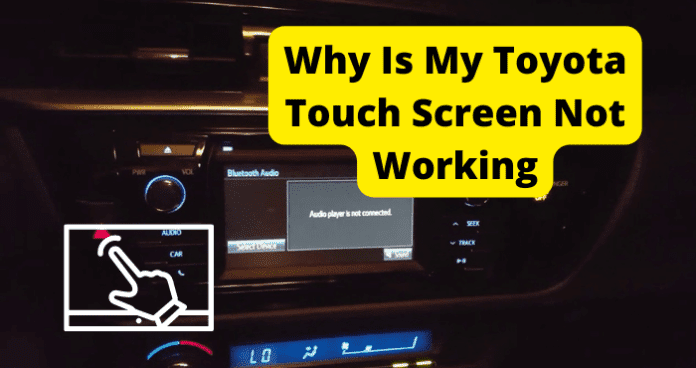
Has your Toyota’s touch screen stopped working? This problem is most common in the following Toyota models: wigo, vios, highlander, prado, Auris, Corolla, Tacoma, and Yaris.
There are a wide variety of potential causes, each with a few potential solutions. Let’s look at the most common causes and their potential solutions.
How to Reset Toyota Touch Screen
Before I get into why your touchscreen might not be working, the first thing you should do to fix the problem is reset your Toyota touch screen.
Rather than me explain this to you in steps, I’ve skipped to the portion of a YouTube video to exactly where it explains how to reset your Toyota touch screen.
Why Is My Toyota Touchscreen Not Working?
1. Bug
One of the most common problems is quite simple. Your touch screen has a bug. Bugs are common in all kinds of digital electronics, usually resulting from a code or loading error in the device’s scripting.
There are several potential fixes for this. Don’t worry; you do not need to know how to code to perform any of them.
Fix – Perform a soft reset
The next method worth trying is to perform a soft reset. This is where we reboot the system using basic commands. This is possibly the simplest method, as it consists of turning the device off and on again with specific key and button commands.
1. To start, park your vehicle in a safe area and remove your key from the ignition.
2. Place your key into the ignition lock and turn it to the on position. Alternately, press your engine button twice. Do not turn on your engine.
3. Wait for your touch screen to power on, then press and hold power/volume knob for twelve seconds. This should reset your screen. This occasionally does not work.
An alternative way might be. You can power it on again without engaging the engine, then take your phone and disconnect it from your vehicle.
Then enter your vehicle’s Bluetooth settings and remove your phone from known devices, then press and hold the volume/power button for twelve seconds.
As stated, this process performs a soft reboot, powering the entire system down and powering it back up again. Both methods should accomplish the same effect. If neither of these methods works, return to step one or try an alternate method.
Fix 2 – Perform master Reset
After attempting a soft reset, the next logical step is a hard or Master reset. A hard reset does more than cut and restores power.
A hard reset changes files and settings within your system in order to increase function efficiency by resetting it to a near factory default state.
This process wipes all saved data from the device, effectively resetting it to the factory default state. If there is specific data you wish spared from this process, it’s best to remove that data before beginning this procedure. To perform this, follow these steps.
1. To start, park your vehicle in a safe area and remove your key from the ignition.
2. Insert your key into the ignition lock and turn it to the on position or press the engine button twice. Do not turn on the engine.
3. Then press and hold on to the physical Apps button on your multimedia system.
4. While holding the button turns the lights on and off three times.
5. When you’ve done this, a diagnostic menu should appear on the screen.
6. When it appears, press and hold the INIT button on your screen.
7. This should key up a prompt reading “Personal data is initialized. OK?” to which you’ll respond YES.
8. Now power on your engine, and check to see if all radio stations, phone connections, and Bluetooth connections have been removed.
This is the most reliable method for your device’s long-term, glitch-free use. If this method does not work, please return to step one or try an alternate method.
Fix 3 – Perform cycle key
Cycling your electronic keys is an effective way to do a basic reset of your electronic systems.
This is basically a hard reset for all of your car’s electronic systems, not just your touch screen. This can be helpful if the bug lies not in your touch screens code but in the coding of your larger electronic system.
1. To start, park your vehicle in a safe area and remove your key from the ignition.
2. Unlock your car and open your front driver’s side door and only your front driver’s side door.
3. Then, using your power lock switch, the electronic door lock on your driver’s door, lock and then unlock the door five times, finishing in the unlock position.
4. Close and open the door once. Lock and unlock your driver’s door using the power lock another five times, ending in the unlock position.
5. Then, insert your key back into the ignition and turn it from off to on twice.
6. Remove the key from the ignition. The door locks should now cycle, indicating the car is now in programming mode. If the locks do not cycle, begin again.
7. Press and hold the lock and unlock buttons at the same time for about two seconds, then release.
8. Then press the lock button for one second.
9. If the car has accepted the remote, the locks will cycle once to indicate it. If they cycle more than once, you’ll need to try adding the remote again.
You do not need to go back to step one! However, if it still has not been accepted, you may have the wrong remote. Close the driver’s door to end the process.
10. Remove the key from the ignition and test your remote.
Warning, sometimes actuators on older models are faulty and won’t fully unlock or lock doors with the power lock switch.
If your car is one of these, it will not enter programming mode. You can manually lock and unlock with one hand and use the switch to lock and unlock the other.
If you time it correctly, this should put it in programming mode. If this does not work, return to step one, or try an alternate method.
Fix 4 – Wait For A Few Days
If you have completed the first three fixes and have found success, the recommendation is to wait if possible.
After twenty-four to forty-eight hours, check to see if the problem has been corrected. If the problem persists attempt an alternate method.
Fix 5 – Contact The Dealership Or Toyota
If, however, the bug persists despite all fix attempts and regardless of time spent or waiting, it is recommended you contact your local Toyota dealership or Toyota corporate customer service representatives, and they will assist you in troubleshooting your device.
While bugs are the most common problem with the touch screen, that doesn’t mean that there aren’t other potential issues with the device. A few other problems may crop up, some more difficult to address than others.
2. Short Circuit In The System
Short circuits are common in all kinds of electronics, and your car is no different. Whether it results from faulty wiring, worn-out cables, water damage, or even animal interference, squirrels and mice are a menace to car cables, and a short circuit can interfere with your system’s functions.
Fix – Check the Connectors and Take The Help Of A Car Electrician
The best diagnostic options are to keep an eye on your wires and cables as best you can. Repair options are more complicated. The best advice is to take steps to prevent damage when possible.
Keeping your vehicle in a dry, properly enclosed space will help prevent water and pest damage.
Check your connectors if you think there may be a shortage in the system. If you find damage, do not attempt to resolve the issue yourself.
Few repair tasks are more dangerous for inexperienced handymen or mechanics than electrical work. Contact a professional and get the vehicle repaired.
Trying to fix it personally is worth the extra money to prevent the serious damage you could do to your car or yourself.
3. Bad cables
Like the previous problem, cables wear out just like wires, and for similar reasons. Again, preventative measures are likely to serve you best here.
That said, once issues with the cables are suspected, there are steps that can be taken.
Fix – Disconnect, then reconnect cables
To start, look for any outstanding damage. If no damage is observed, disconnect and reconnect the cables one at a time.
Testing the system between each cable. If damage is observed, replace the cable. Once again, do not attempt to do electrical work on your own vehicle. Get professional assistance.
4. Display Is Faulty
Another possible issue is a fault in the display itself. This can be the result of a short within the screen, damaged glass, damaged back plating, warping or fading of the color in the display, and other issues.
Like your smartphone or tv, it isn’t a repairable issue.
Fix – Recover Or Replace Display
You’re going to need to replace part or all of the interface to fix this problem. Again, do not do this by yourself. Electrical work, especially on delicate devices like screens, is very difficult and potentially dangerous. Seek professional assistance.
5. There’s No Power Going To It
If you cannot interact with the system at all, it’s possible it isn’t receiving power. You should check the fuse box if you suspect this is the case. This will be practically the same chore you do in your home.
The major difference between the two is that instead of a slate gray box on the wall as large as your head, the fuse box in your car is small, hard to find, and sometimes very difficult to reach physically.
There are actually multiple fuse boxes in your car, but for this procedure, we only need to access the box inside the cab, not the one under your hood.
Fix – Check Fuse Box
Checking the fuse box in your vehicle can be different depending on what vehicle you own.
We’ll start with the Auris and Corolla, which have the same procedure.
1. To start, park your vehicle in a safe area.
2. Turn the engine off.
3. Turn off all electrical accessories
4. Locate the fuse box under the steering wheel.
5. Open the fuse box cover
6. Check your vehicle owner’s manual for instructions to identify which fuses are linked to your touch screen system. Toyota also has instructions online if you cannot find your owner’s manual.
7. Remove the affected fuses.
8. Check to see if the fuses are broken. To determine this, examine the small wire inside. If the wire is broken, the fuse is blown.
9. Make a note of the blown fuse’s amperage rating and obtain a replacement with the same rating.
10. Replace the fuse.
The Tacoma has a slightly different procedure, as its fuse box is in a different location.
1. To start, park your vehicle in a safe area.
2. Turn the engine off.
3. Turn off all electrical accessories.
4. The fuse box is located behind the storage compartment on the driver’s side dashboard. Open the auxiliary box.
5. Pull up the box.
6. Disengage claws
7. Remove the stoppers from the cutouts.
8. Remove the box.
9. Open the fuse box cover
10. Check your vehicle owner’s manual for instructions to identify which fuses are linked to your touch screen system. If you cannot find your owner’s manual, Toyota also has instructions online.
11. Remove the affected fuses.
12. Check to see if the fuses are broken. To determine this, examine the small wire inside. If the wire is broken, the fuse is blown.
13. Make a note of the blown fuse’s amperage rating and obtain a replacement with the same rating.
14. Replace the fuse.
Finally, we have the Yaris.
1. To start, park your vehicle in a safe area.
2. Turn the engine off
3. Turn off all electrical accessories.
4. The fuse box is located on the driver’s right-hand side, under the dashboard.
5. Remove the box.
6. Open the fuse box cover
7. Check your vehicle owner’s manual for instructions to identify which fuses are linked to your touch screen system. If you cannot find your owner’s manual, Toyota also has instructions online.
8. Remove the affected fuses.
9. Check to see if the fuses are broken. To determine this, examine the small wire inside. If the wire is broken, the fuse is blown.
10. Make a note of the blown fuse’s amperage rating and obtain a replacement with the same rating.
11. Replace the fuse.
Once you have successfully replaced the necessary fuses, power should return to the screen. From there, you can continue any other diagnostics needed. If your screen does not light up after replacing the fuses, proceed to check your wiring and see if a problem is blowing your fuses.
6. Toyota Sync Is Out Of Date
Another plausible reason for issues with your touch screen is that your sync system is outdated. Like any other company with software being integral to their systems’ functions, Toyota regularly updates that software.
If your vehicle’s systems are far enough out of date, it will cease to function properly and eventually cease to function at all. To fix this, you need to check regularly for software updates online.
These can be found on Toyota’s website.
Fix – Update Toyota Sync
To update Toyota sync, you’ll need a blank flash drive two megabytes or larger in size. I suggest naming your flash drive something memorable, which will help you during the process.
1. Insert the flash drive into your computer
2. Download the latest update by selecting download at the bottom of the webpage.
3. Save the file you’ve downloaded. You can find it in your downloads folder or manually save it into a specific folder. You may wish to rename the file to make it easier to read and remember.
4. Copy the saved file onto your flash drive.
5. Select vehicle installation instructions at the bottom of the webpage to access instructions on how to complete the installation
6. You can either have these emailed to you or you can print them directly.
7. If properly updated, this should correct your system settings and allow you to work your touch screen properly. If this fails, attempt one of the solutions previously listed.
Final Thoughts
Hopefully, one of these solutions will work, and you’ll have a functioning touch screen again by the end of the day. This has been one of those classic examples of technology being both a blessing and a curse.
While the benefits of the touch screen and its features are undeniable, assisted navigation, Bluetooth connectivity, phone call support, even internet radio, and inbuild vehicle Wi-Fi.
When something as complicated as these devices breaks or malfunctions, it can be quite daunting to contemplate their repair or replacement. Most of us are not technical wizards who can build our own computers or repair television sets.
Rather, we are ordinary people who hope not to have to bankrupt ourselves every time one of the miraculous devices we rely on stops working. Thankfully, we don’t have to do it alone.
Y’all thank you so much! This helps a ton! Option 2 worked
Where I can find update file for my IM 2017