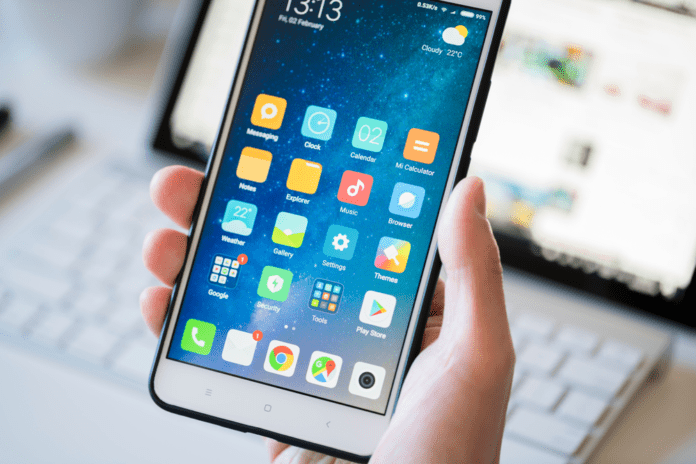
If you are like most people all these apps have a specific place you like to keep them, and they stay there pretty much the whole time you have your Android. You might swap out one or two here and there, but overall the layout and apps on your Home Screen tend to stay the same.
Unless of course you or someone else accidentally moves apps or deletes them from the Home Screen. You can prevent that from happening to you and lock your home screen layout and apps in place.
This is a great feature for active people that have accidental touches happen to them while their device is in their pocket. Its also great for those parents out there who let their kids play with their Android. This feature will prevent the layout, widgets, and apps from being changed or altered in any way.
Turning this feature on does limit what you can do with your Home Screen of course. You won’t be able to add or delete any app icons or widgets when you have your Home Screen Layout Locked. Makes sense, right? That’s what you were looking for.
Enable the Lock Home Screen Layout Feature
1. To enable this feature, go to your Settings on your device. This should be an icon that looks like a Gear, or you can scroll down from the top of the screen and tap the Gear icon there
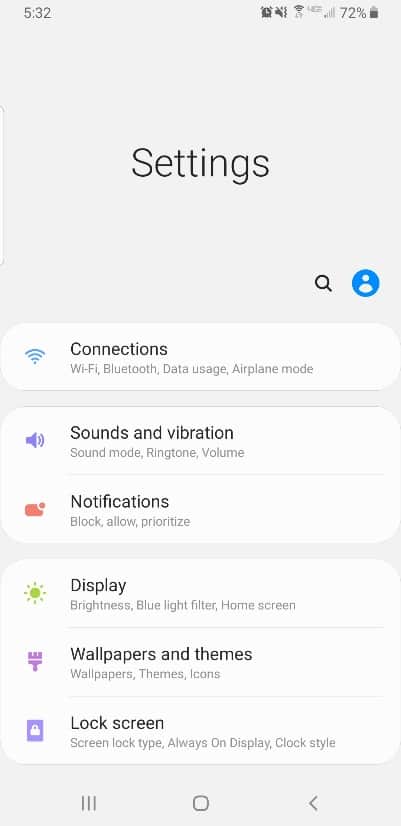
2. In the Settings menu, tap the Display tab
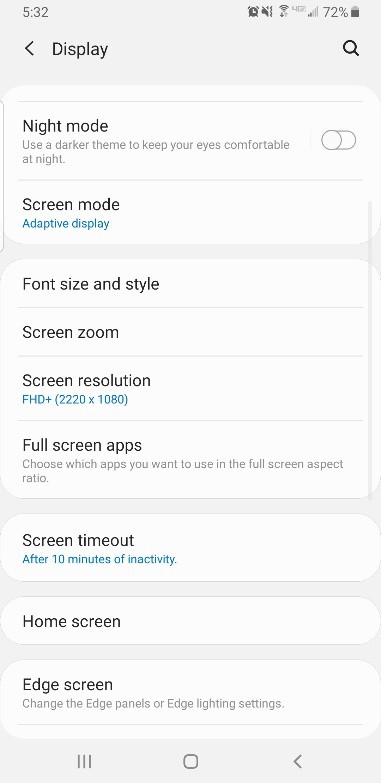
3. Now, you need to tap the Home screen tab
4. This is where you will find the option to Enable the Lock Home Screen Layout feature
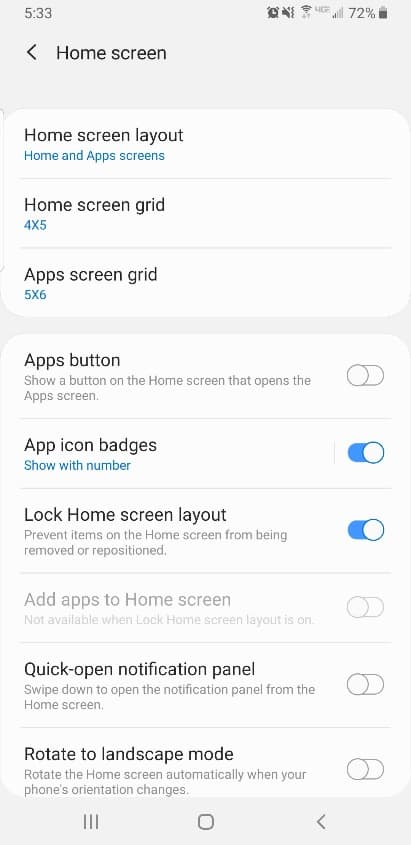
5. Tap the toggle switch to enable and disable the feature as needed, maybe you want to move some things around or add an app icon or widget to the Home Screen. When you are done with your customization, turn the feature back on to lock your home screen again
Again, you will not be able to move anything or delete anything by accident. If you try to do move icons or widgets or delete something from the Home Screen you will receive a notification saying “Can’t move item. Home screen layout locked.”
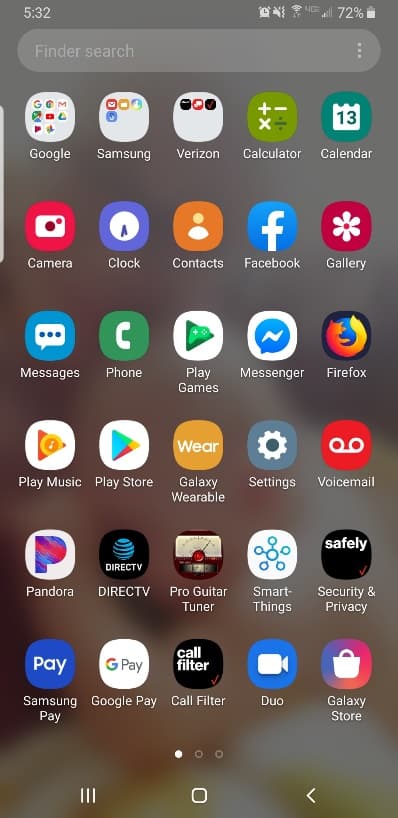
There is still an option to customize your Home Screen by using the Galaxy S9 home screen edit mode. This feature has many customization options, and some that you can’t find in your Settings. This lets you customize your Home Screen without ever leaving it.
The long list of things you can do in this edit mode is rather surprising.
- Change wallpaper for the home and lock screen
- Add widgets to the home screen
- Change your Galaxy theme
- Align app icons
- Add or delete panels on the home screen
- Re-arrange panels
- Turn app icon badges on and off
- And a few others
Enter the Home Screen Edit Mode
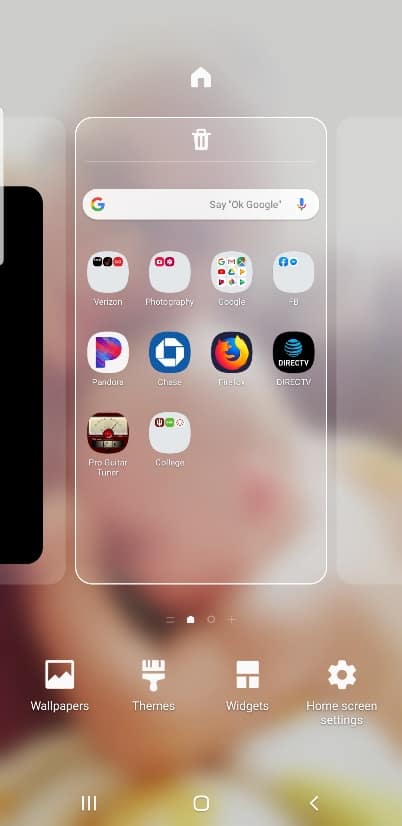
- Find an empty area on your Home Screen and Tap and Hold it
- You can also use a Pinch Gesture to enter the Home Screen Edit Mode
Notes: If you can’t access the home screen edit mode you may be using the Easy Mode. You have to be in Standard Mode to customize your Home Screen.
1. To exit Easy mode, open your Settings

2. Then, tap the Display tab
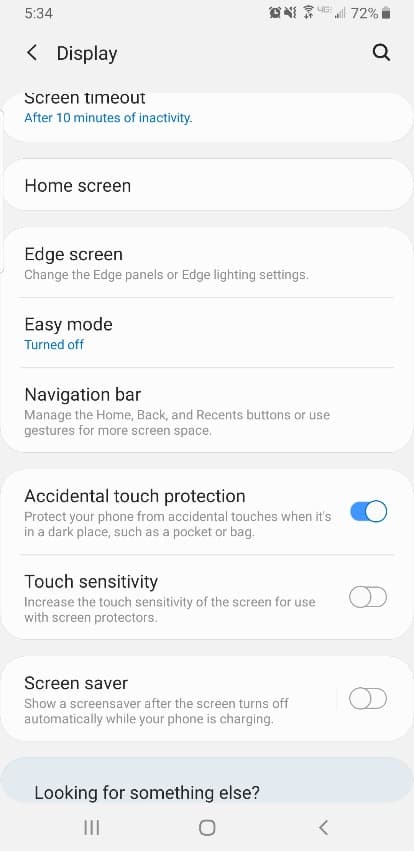
3. Scroll until you see the Easy Mode tab and tap it
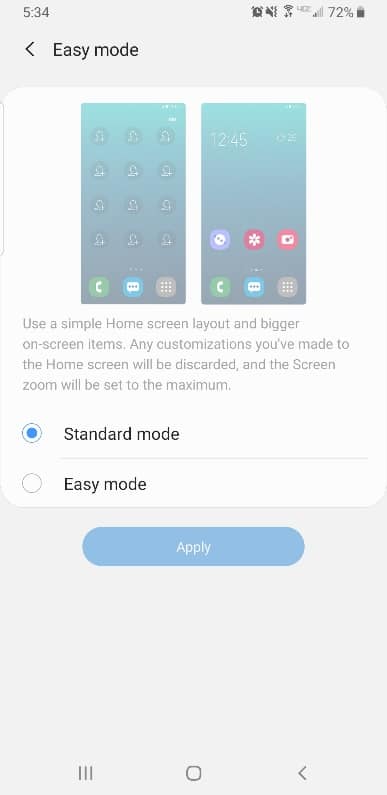
4. To finish, tap the Standard Mode option and then Apply. This will let you customize your Home Screen
Home Screen Won’t Lock? Try These Fixes
1. Restart your Android Device
When it comes to solving performance issues (or just making your phone feel faster), it really boils down to one thing: RAM usage. With most modern operating systems, as you use apps, they fill up the RAM. The more apps you open, the more they use up RAM. It’s just how it works.
But as you close apps (or they’re manually removed from memory) they’re not completely closed out. In fact, remnants of apps stick around, keeping RAM needlessly full, leaving less and less room for new apps.
Now, the OS will still move things around to make room for new apps to be loaded into RAM, but that’s where things may start to slow down a little bit; not only does it have to load the app, but things have to be shuffled around in RAM to make room for the new applications to load.
Now, in order to restart your Android device it is quite simple as all you have to do is:
Step 1. Hold the power / lock button, usually located on the side of the phone, below the volume buttons.
Step 2. A side menu will appear offering options to: “Power Off”, “Restart” or “Screenshot”.
Step 3. Select the “Restart” option, this will restart the device.
This will restart your Android device and should resolve the problem.
2. Force Restart Phone
Another good method to get rid of a bug in your device is to perform a force restart. This is very similar to a normal restart; however, unlike the regular restart, this force restart cuts the power to your phone more effectively than compared to a regular restart.
If you are using your Android phone, you can perform a force restart by: simultaneously pressing and holding power and the volume keys down for more than seven seconds.
This will perform a force restart on your Android device and certainly could be the answer to the issue. You can visualize this method as essentially unplugging your PC to power it off.
Now, remember when you perform a force restart; none of your contacts or information will be lost, it should all be there when your device is powered back up.
3. Power Your Samsung Device in Safe Mode
In Safe mode, your device will not run any third-party apps. This allows you to easily identify and remove the app that may be causing the problem.
Seeing as a third party could be the issue as discussed in the uninstalling the app section of this article.
Now, in order to power your Samsung device in safe mode; all you have to do is: You can put an Android device into Safe Mode by holding down its power button, then pressing and holding the Power off button until the Safe Mode button appears.
4. Perform a Factory Reset
Sometimes with these technical issues, you have to resort to performing a factory reset. Make sure to back up all critical files and data before proceeding with the factory reset. So, while this is a solution, it should be considered to be the last result for answering a problem with your device.
Now, if you are using your Android phone you can perform a factory reset by following these steps:
Step 1. Ensure the device is plugged in or has enough battery to go through the reset process.
Step 2. Open the Settings app.
Step 3. Select “System”.
Step 4. Go into Reset options.
Step 5. Hit “Erase all data” (factory reset).
Step 6. Tap on “Erase all data”.
Step 7. Enter your PIN if prompted.
Step 8. Select “Erase all data” and let the phone do its thing.
This will factory reset your Android device. Keep in mind that this should be a last resort as you will lose all your stored apps and data. So, be careful and back up any files that you do not want to lose.