Chances are you have an Instagram account that you’re active on. Active is subjective, since most people scroll through Instagram every day without posting often and others post nearly every day. The appeal is in being able to design your profile to show just what you want it to show, whether it’s a real image or not.
Users can also post Stories, which are on their accounts for 24 hours, and add highlights to their profile for the stories that they want to keep on their profile. The more you engage on Instagram, the more follow requests that you might get.
If you’re a private account, meaning you have to add someone as your follower for them to view your profile, you probably want to accept all the follow requests that you have so that they can engage with your profile.
Using a Third Party App
If you have tons of follower requests, you may be tempted to not accept them individually one by one, but you’re going to have to. Taking the easy route and downloading an app that accepts them all for you isn’t the best idea. Instagram is one of the more frequently hacked into platforms, and you’ve probably heard of this happening or you know someone who this has happened to.
If you download an outside app to accept the follow requests for you, you’re going to have to trust them with the username and the password to your Instagram account. They also might sell your information to other companies and are most likely operating with the least amount of security. Save yourself from the headache of taking back your hacked into account and just accept the follow requests yourself.
Accepting All of Your Follow Requests
If you know that you’ll want to follow everyone who has followed you, all you have to do is take your account off private. All your requests will be accepted and then you can put your account on public. To put your account on public, here’s what you have to do.
1. Launch the Instagram app. You should be on your News Feed after you launch the app.
2. At the bottom of the screen, you’ll see five icons. Tap on the icon that resembles a person furthest to the bottom right side of the screen. You should now see your profile.
3. In the top right side of the screen, you’ll see three horizontal lines. Tap that icon and a menu will emerge from the right side of the screen.
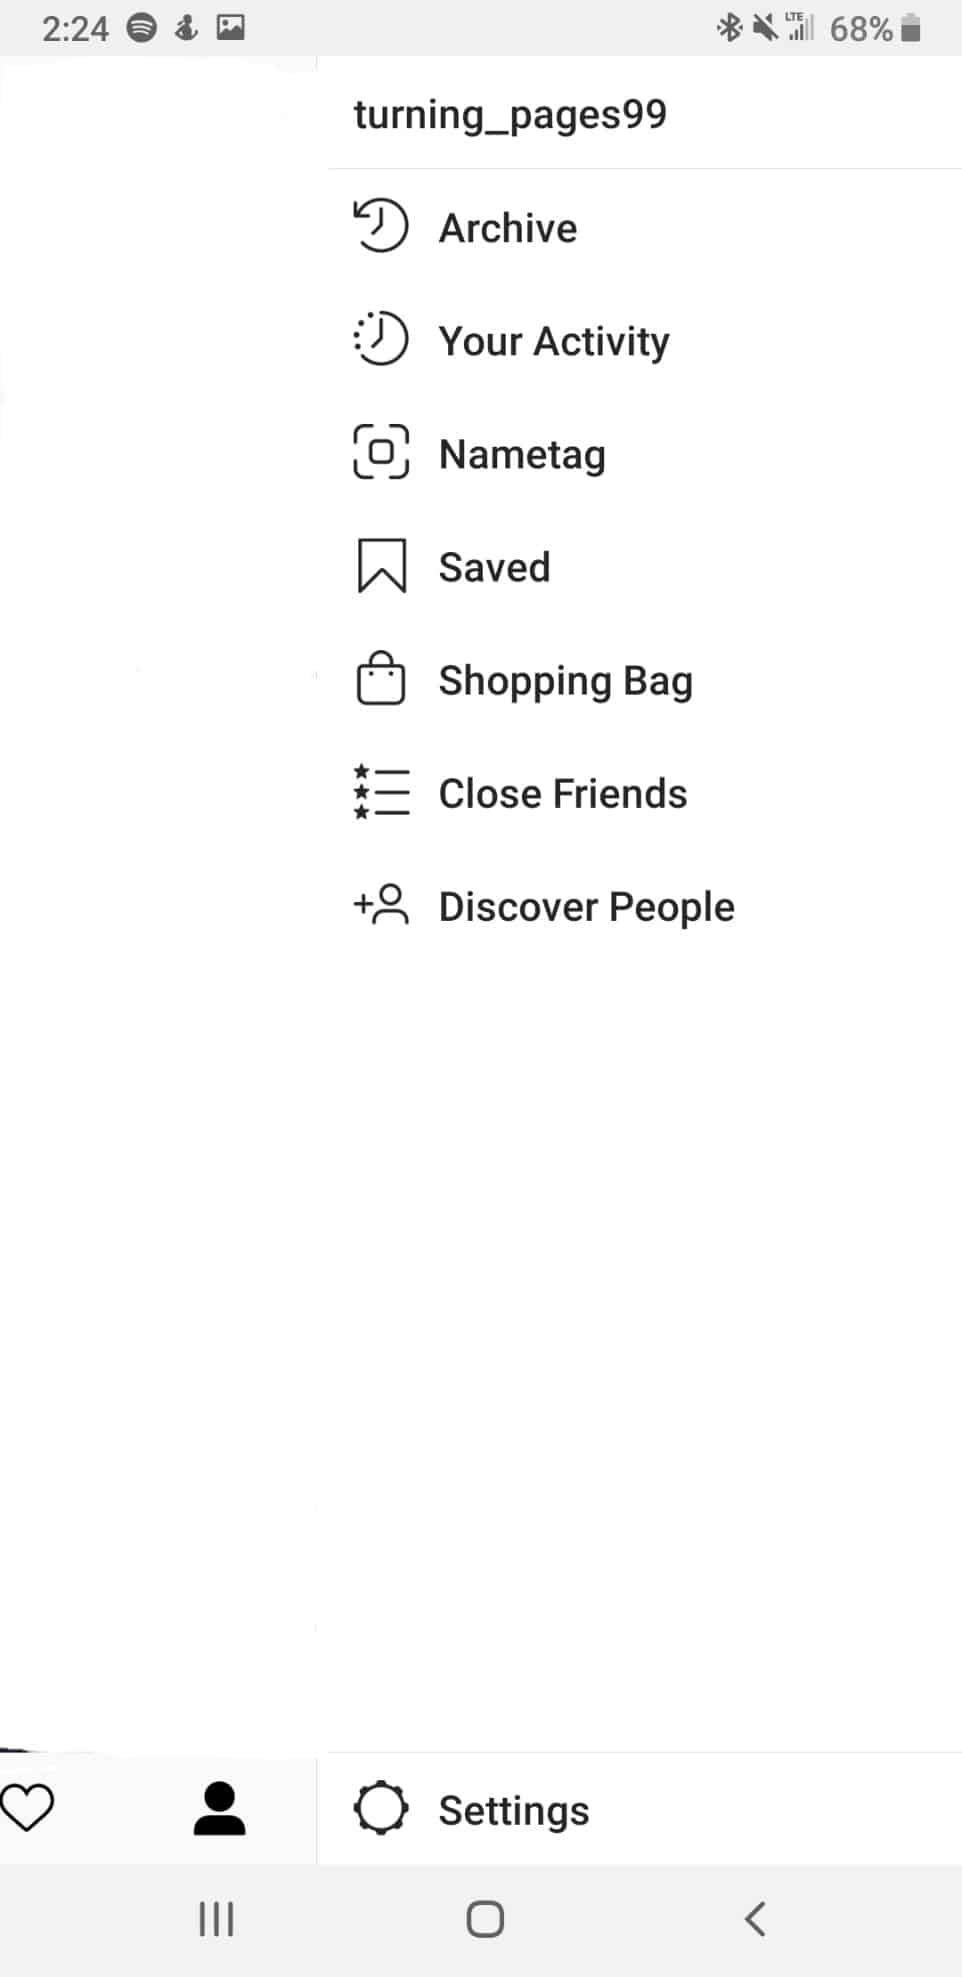
4. On the menu that emerges, select “Settings” at the very bottom of it.
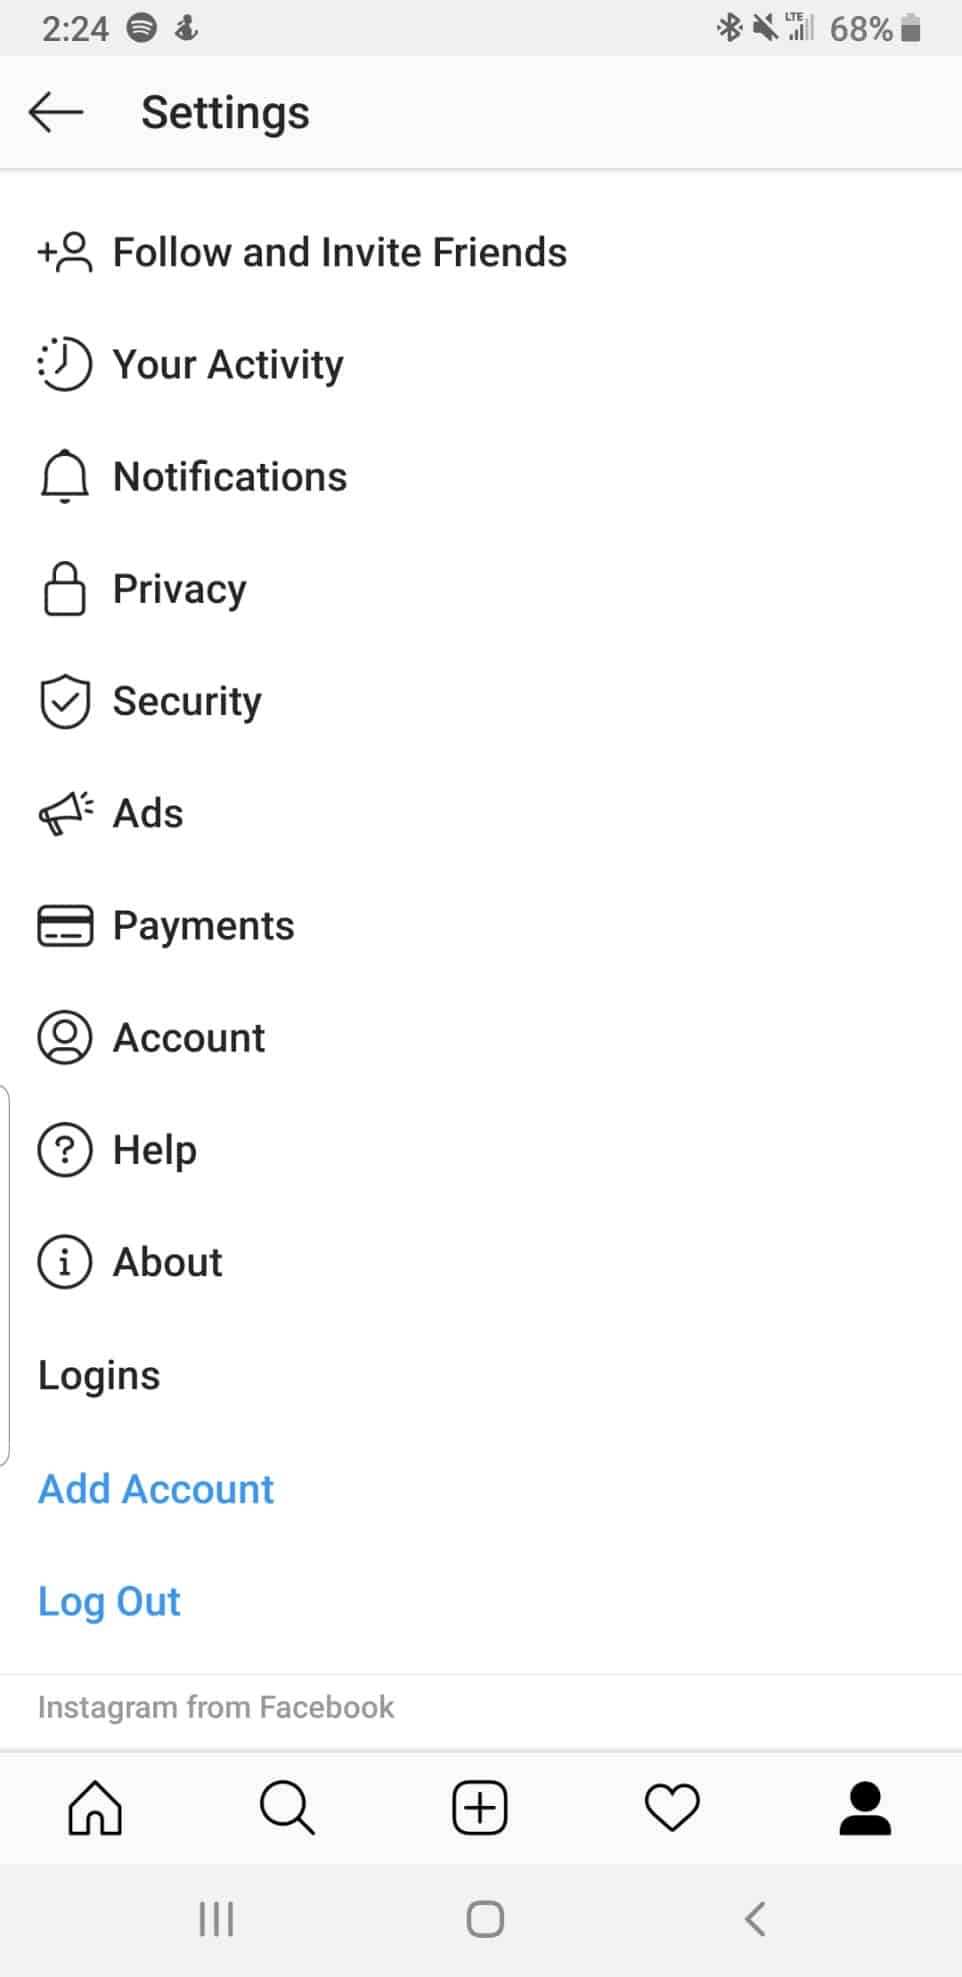
5. In the settings menu that you’re navigated to, select “Privacy.”
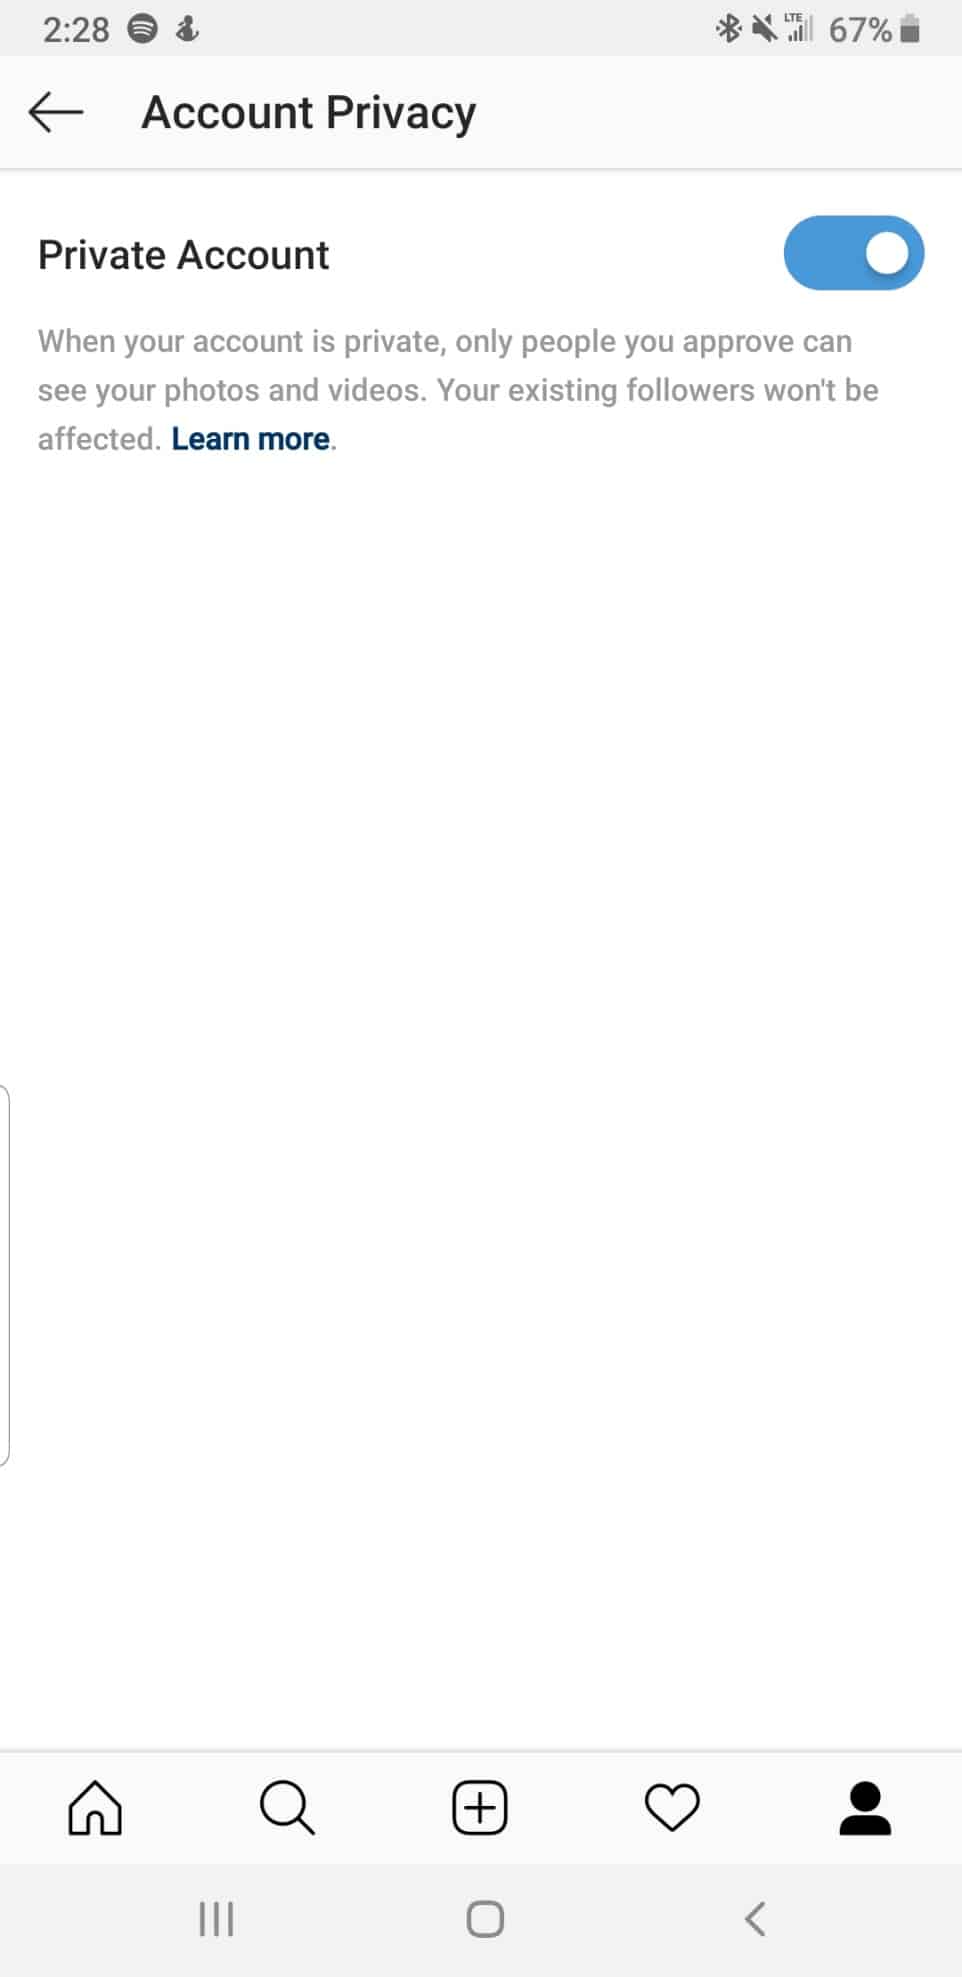
6. Tap the switch next to “Private Account” to off so that it isn’t blue.
Now all your friend requests will be fulfilled since you turned your account on Public.